I wonder how long that will take?
I wonder how much it will cost?
If you’re new in business, or simply new in a position that requires you to estimate the time and cost for projects, these are questions that come to mind and must be answered efficiently and as accurately as possible. You can’t afford to be too low in your estimation and you can’t afford to be too high and miss out on the opportunity to win the project.
In this post I will share with you the methodology that I use on a daily basis to provide estimates for the custom work that I quote. I was fortunate to watch my grandfather estimate hundreds of jobs when I was a teenager, so some of it I’ve internalized and don’t think about anymore. After one of my younger brothers asked me about estimating recently, I realized that this is something that all young entrepreneurs and even established managers of businesses may struggle with.
The good news is that you don’t have to struggle with it any longer. If you take this simple approach, practice it consistently, and track your results, you’ll be able to estimate accurately and have a more profitable and stable business model.
For the sake of this example we’ll imagine that you’ve been hired to build a small kitchen table and a set of four chairs. You can use this methodology on any type of project, with physical or digital deliverables, just be sure to follow the steps and principles I’m mapping out for you. So let’s dive into it and walk through each step.
Step 1: Define the Scope of the Work
In order to be successful at estimating you need to start by defining what you already know. In our case we know that your end goal is to build a table with four chairs. Rather than leave it at that, let’s get some specific answers from the customer who’s requesting this:
- How high should the table be? (Google what standard table heights are and compare to your own kitchen table)
- What color do you want it to be (painted or stained), and if stained, what type of wood do you want?
- Can you provide some reference pictures of tables you like and what you like about them?
- Do you have a specific deadline in mind for when you’d like this done?
Information gathering is key to successful estimation, so you’ll want to ask these questions or similar questions that relate to your actual project. The more fact finding you do, the better your estimate will be and the less chance of error you’ll have. Let’s imagine that these are the answers that you’ve gotten from your client:
- The table should be 30″ high
- They want it to be made out of Oak with a dark stain
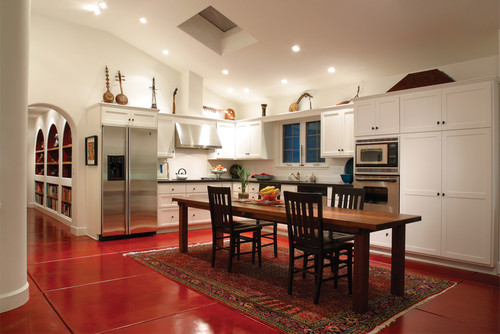
- They’ve provided this picture as a reference design
- They want it done within 60 days
There may be additional details, so be sure to take an adequate amount of time to speak with your prospective client about what they want. Ask them if they have any concerns about the project. This will often lead you to information that is worth having in hand before starting.
Step 2: Break Down the Steps and Use the Rule of 10 to Create an Estimate
Now that we know what the project involves, we’ll use a simple breakdown process to define each section of the project. In a past life I used to build furniture, remodel homes, and do all sort of different kinds of work, so I know the steps involved. The good news is that this thought process and methodology works in all types of industries, not just construction.
So here’s the breakdown of what I imagine this type of project will involve:
- Getting a deposit from the customer (I highly recommend that for any small company or startup you don’t do work unless you have at least 1/3 or 1/2 up front)
- Drawing a design and getting it approved including providing material and color samples and getting it approved
- Gathering the materials
- Doing the rough construction of the table
- Doing the rough construction of a chair
- Sanding and finishing
- Final review and quality control
- Delivering the finished product to the customer and collecting final payment
Now that we have the process broken down into 8 steps we can look at each in more detail. 8 steps is probably adequate for this type of project. Each type of project will require a different level of detail, but the goal is to be able to estimate quickly and efficiently without missing key details. Over time you’ll get faster and better at this process, but early on taking more time will serve you well on the profitability end of things.
1. Getting a Deposit
In my experience furniture makers live in close proximity to their clients. Let’s say that your client lives 30 minutes away. So this step should be very simple in theory. How long will it take you to get ahold of the client, meet up for a payment, or take it over the phone via credit card? (You can use Stripe or Square for this). Tracking people down for payments always takes longer than expected, so let’s say if you have to meet them for this, it could take two trips. If you are including drive time both ways you would need to include two hours for this. Even if you’re doing it over the phone, it will take some time. This part is relatively clear so we don’t use the rule of 10 just yet.
Time for Deposit: 2 hours
2. Drawing a Design and Getting it Approved
It’s important that you and your customer are on the same page, so providing designs is a good way to do this. Some shops do this before getting a deposit, but I wouldn’t advise this. You will deal with too many “tire kickers” if you allow people to use your expertise without paying for it. Here’s how I would think about the time involved for design work:
- Will it take me one hour to draw the design? No, it will take longer than that.
- Will it take me 10 hours to draw the design? No, that seems like too much.
- I think that realistically I can draw this design in 3-4 hours hours, so I’ll estimate safely and say 4 hours for the first draft.
Getting the design approved could be a 15 minute conversation, or it could require some rework. Early on in your career you will want to include rework time. You should also have been paying attention to the customers comments and personality when you first talked to them to see if they seemed like a very detail oriented and particular person, or if they are more big picture focused and will trust you to make the small decisions.
To be conservative if drawing the design will take 4 hours, I would estimate that you will have another 2 hours with re-work, back and forth, and approval. Be sure to always get a sign off on the approval in writing so you and the customer are 100% on the same page. A simple email will do the trick for small projects, but in more involved projects with higher costs and risks a dated signature on the design docs is well worth having.
The design work should also include getting materials and colors approved, so be sure to include that in your process.
Time for Design and Approval: 6 hours
3. Gathering Materials (time and cost)
In this part of the project you’ll need to not only account for your time but also the cost of the material. Here’s how we will approach it:
- How long will it take me to procure the material and get them into my shop to begin work?
- One hour to pickup from the materials vendor for the wood
- One hour to pickup stain and misc other needed items
- What will the cost of the materials be?
The good news with hard goods is that if you have a design with dimensions most materials vendors will happily help you figure out how much you’ll need to buy from them. This is the best way to go about it because you can have an accurate materials list. I would recommend that you always remember to add tax onto what they tell you (unless it’s clearly on their estimate) and then always add 20% on top of their price. This will cover you if you accidentally cut the wrong thing and need a replacement piece.
If you continue to work with your materials vendor you’ll begin to get an understanding for costs so you can have a ballpark amount in mind and reference old materials quotes. In the beginning be thorough and get the exact costs from them. Overlooking this step is the difference between staying in business and going out of business. Trust me, I know!
We’ll assign an arbitrary number for this step, because you’ll rely on your vendor for it, but if something doesn’t seem right, get a second quote. It never hurts. Double check your list and make sure you have pricing for the wood, stain, fasteners, glue, and anything else you can think of that you’ll need.
Materials: $450
Time for Gathering Materials: 2 hours
4. Doing the Rough Construction of the Table
This is another step where you will use the rule of 10 to estimate. Start with something low and work up from there. Here’s how I would think about it:
- Can I build the table in 2 hours?
- No, how about 20 hours? That seems high, that’s half a weeks labor.
- I’m comfortable with the middle ground, so I estimate 10 hours for this step.
Time for the Table: 10 hours
5. Doing the Rough Construction of the Chair
We will follow the same logic for the chair. Don’t think about four chairs, just one since they are presumably all the same. Again, here is how I would think about this part of the project:
- Can I build a chair in 1 hour?
- No that seems low, how about 10 hours? That is more than a days work.
- I’m comfortable with 5 hours for chair construction.
There is no magic formula for the low number I choose, that is why this is called estimation! 🙂 I know that seems tough at first, but over time you’ll learn these numbers and it will get easier. This is just how to get started in the beginning. You are taking a risk estimating something you don’t have a lot of data on, but you will have smarter data as you go along. We’ll cover that later in this post.
Time for Building One Chair: 5 hours
Total Time for the Chairs: 20 hours (single unit of work multiplied by total units)
6. Sanding and Finishing
Now that you’ve covered the time for rough construction you’ll need to allow time for sanding and finishing. Here’s my thought process about that:
- Can I sand and finish in 2 hours?
- No that seems low, how about 20 hours? That is half a week, way to high.
- I’m comfortable with 12 hours because I think 2 hours per chair and 4 hours for the table will be adequate
Time for Sanding and Finishing: 12 hours
7. Final Review and Quality Control
This step should be pretty fast, I am not going to spend a ton of time estimating it, I’ll go with my gut guess. There aren’t a lot of variables here.
Time for Quality Control: 1 hour
8. Delivery and Collecting Final Payment
Coordinating delivery and collecting payment should be pretty simple. If you’re dealing with a good customer they will happily arrange the next available time because they have been anticipating the arrival of their beautiful new kitchen table. They are 30 minutes away from you, and you’ll probably have an hour on site worst case. Be sure to be clear when scheduling this that you expect payment on delivery. There’s no point in dropping off your work and then hoping they’ll pay sometime soon!
- 1 hour drive time (both ways)
- 1 hour on site
Time for Delivery and Payment: 2 hours
Step 3: Putting it All Together
You should be doing this estimate in a Google Sheet so it’s easy to add up and so you have it to look back on after you finish the project. If we look at the above numbers here’s what we’re totalling up to:
Total Materials Cost: $450
Total Hours: 55
Double check your math and make sure you didn’t miss anything. I always do this in a spreadsheet so I don’t have to worry about missing adding a number in.
If you have other contractors or employees you need to pay, make sure the numbers you estimated accurately include their time as well. Maybe someone else does the finishing for you. If so, get a quote from them.
Add tax and markup:
Be sure to talk to your accountant and get their advice on how much you should mark up materials and any taxes you need to include. I won’t touch on that specifically here because I’m not a CPA!
What’s the total price?
You’ll need to look at what the marketplace can bear. Are you an expert in your field and have a waiting list of customers? Charge a higher hourly rate. Are you just getting started and established? Charge a reasonable rate that gets you the income you need but doesn’t price you out of the market. Work with your CPA on this too, because they have a good overall picture of what your business needs to thrive profitably.
If you used $50 as your hourly rate, the labor cost would be $2,750
If you used $30 as your hourly rate, the labor cost would be $1,650
The $30 an hour rate seems reasonable to me if you are just getting into this industry but have the skills and experience to provide a high quality finished product. For sake of our example we’ll go with that pricing for the hourly wage.
Labor Cost: $1650
Materials Cost: $450
Subtotal: $2,100
At this point it’s a good idea to mention two important overall pricing factors:
- Margin for error
- Profit margin
If you’re trying to build a business that can grow and succeed, you can’t just look at the job cost level of things, you have to think about what your company needs to keep the lights on. Home workshops don’t have to pay the heat bill so to speak, but it doesn’t mean that you should price this way if you someday want to leave your garage and have a stand alone business. Once again this is a good topic to cover with your CPA or business coach so you can get some outside perspective. We’ll go with a theoretical number here so you can understand what I’m referring too, but be sure to explore this more thoroughly with someone who has the experience and credentials to help you.
If I am hoping to grow my business I will add a 30% margin on top of the pricing so that if I am off on one of the estimated steps I have some cushion, and so if I’m right I can add some profits back into the business for advertising and other needs.
$2,100 multiplied by 1.3 equals $2,730. That’s the price I would quote the customer. There are two other factors that affect the final pricing in my mind as well:
- Are you super busy right now and don’t really “need” the work? Round up your number a little, let’s say to $2950. This way if you get it, you make extra profit and if you don’t get it, it’s ok, you have other work right now.
- Are you really slow right now and would be better working for a slightly lower profit margin, or even just to cover your hourly wage? Price it at $2,395 so you have better odds of winning the bid.
While neither of those options is a set in stone or guaranteed approach, they are things I think about when quoting work. You need to know where the businesses workload is at and act accordingly. When you’re ready to send the proposal to your client, make sure it looks clean and professional, Freshbooks is a great option for making proposals and payments a cinch!
Final Thoughts
Estimating is an art as much as it is a science. The key to being successful at it is to use a process, track your results, and then compare after the job is done. You can go back and make notes on each step of your estimate and improve your process and estimating the next time around. Over time you’ll get a better and better sense for what things take. If you were wrong about the time for finishing and it only took 8 hours, make a note of that. If you were wrong about the chair construction and it actually took 6 hours per chair, make a note about that.
Once you have an accepted proposal from the client, work hard to beat your estimate and still provide outstanding quality. This is the game of business and there is nothing more exciting or challenging in my opinion.
I hope this post has been valuable for you no matter what business you’re in. If you enjoyed it, it would mean a lot to me if you shared your feedback in the comments below, and also shared this post. That’s what keeps me motivated and keeps me writing! As always, please reach out with any questions and I’ll do my best to provide you with great answers and resources.